Installing Hermes
Introduction
The Hermes installer is packaged in a self-extracted Java archive (JAR). Please download the source code from GitHub and build the Hermes Installer by Maven. Otherwise, you may download the JAR file from hermes2_installer.jar. Upon proper invocation, you will see an installation wizard, either in graphical or text format. Following the steps will install the following components:
- Hermes core
- Hermes plugins (AS2 / AS2 Plus / ebMS)
- Database tables of Hermes plugins in one of the following database:
- Postgres 9.4 or later
- Oracle 11gR2 or later
- MySQL 5.5 or later with InnoDB storage engine supported
- Web service usage sample
Prerequisite
- Java SE Development Kit 8 (For details, pls refer to Install Java SE 8)
Java Cryptography Extension (JCE) Unlimited Strength Jurisdiction Policy Files
Download the JCE Unlimited Strength Jurisdiction Policy Files for JDK 8 from http://www.oracle.com/technetwork/java/javase/downloads/jce8-download-2133166.html
Unzip the downloaded file
unzip jce_policy-8.zip
Replace the two jar files
local_policy.jarandUS_export_policy.jarin the directory/usr/lib/jvm/java-8-oracle/jre/lib/securitywith the corresponding jar file unzipped in the previous step.cd UnlimitedJCEPolicyJDK8 sudo cp local_policy.jar /usr/lib/jvm/java-8-oracle/jre/lib/security/local_policy.jar sudo cp US_export_policy.jar /usr/lib/jvm/java-8-oracle/jre/lib/security/US_export_policy.jar
Tomcat 8.5 or above with port
8080Install Tomcat8.5+ (Ubuntu 16.04)
sudo apt update
sudo apt install -y tomcat8
Change the ownership and mode of tomcat-users.xml
sudo chown <current user>:tomcat8 /etc/tomcat8/tomcat-users.xml
sudo chmod 640 /etc/tomcat8/tomcat-users.xml
Restart Tomcat
Note
To access the admin page, please create a Tomcat user with an admin role by defining this user in
tomcat-users.xml. Please refer to the Realm Configuration section in the Tomcat documentation for more details.
Sample of
tomcat-user.xml:<?xml version='1.0' encoding='utf-8'?> <tomcat-users> <role rolename="tomcat"/> <role rolename="admin"/> <role rolename="api"/> <user username="corvus" password="corvus" roles="tomcat,admin,api"/> </tomcat-users>
- One of the following databases is installed:
- PostgreSQL 9.2 or later.
<POSTGRES_HOME>is referring to the home directory of PostgreSQL in the remaining parts of the document. - MySQL 5.5 or later.
<MYSQL_HOME>is referring to the home directory of MySQL in the remaining parts of the document. - Oracle 11gR2 or later.
<ORACLE_HOME>is referring to the home directory of Oracle in the remaining parts of the document.
- PostgreSQL 9.2 or later.
Installation
Step 1 – Environment setup
The above prerequisite items are installed and running on the same machine.
Step 2 – Database Configuration
Postgres
- Create a new DB user
corvuswith passwordcorvus.- Open a terminal
- Login an account with root or sudo privilege
- Change folder to
<POSTGRES_HOME>/bin - Type
sudo -u postgres createuser -A -d -P corvus - Enter the sudo password to escalate privilege to root user, if the current account is not root
- Enter the password
corvusfor the new usercorvus - Enter the password again for confirmation
- Create two databases named
as2andebmswith thecorvususer.- Change folder to
<POSTGRES_HOME>/bin - Type
sudo -u postgres createdb –U corvus –W as2 - Enter the sudo password to escalate privilege to root user, if the current account is not root
- Enter the password
corvus - Repeat steps 2b - 2d for the
ebmsdatabase.
- Change folder to
MySQL
Create two databases named
as2andebmswith usernamecorvusand passwordcorvus.Open a terminal
Login an account
Change folder to
<MYSQL_HOME>/binType
mysql –u <MYSQL_ADMIN> -pwhere<MYSQL_ADMIN>represents the name of an administrator/super-user in the MySQL database (default:root)Enter the command below to create the
as2database. Note that specifying collate tolatin1_general_csis essential.create database as2 collate=latin1_general_cs;
Enter the command below to create and assign access privileges to user
corvus.grant all on as2.* to 'corvus'@'localhost' identified by 'corvus';
Repeat steps 1e – 1f for the
ebmsdatabase.
Oracle
Oracle database creation involves a number of steps and custom parameters for different requirements. Below is a guideline for creating an Oracle database for Hermes:
https://docs.oracle.com/cd/E11882_01/server.112/e10897/install.htm#ADMQS0232
Step 3 – Hermes Deployment
3.1 Execute the installer
For Unix/Linux, open terminal and type
sudo java –jar hermes2_installer.jar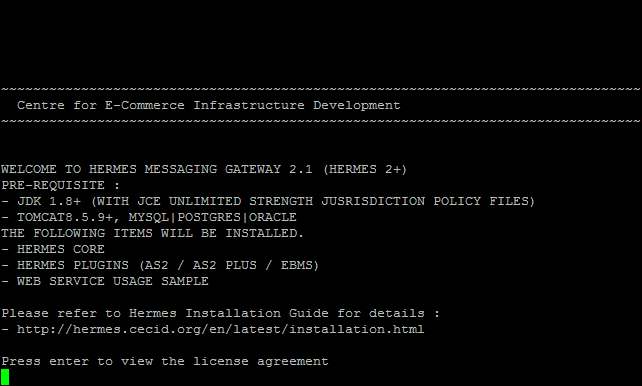
Press Enter until you get to Screen in 3.2 Configure Hermes.
- For Windows, open a command prompt as an Administrator and type
java –jar hermes2_installer.jaror if java is not set in your environment path, specify the full path.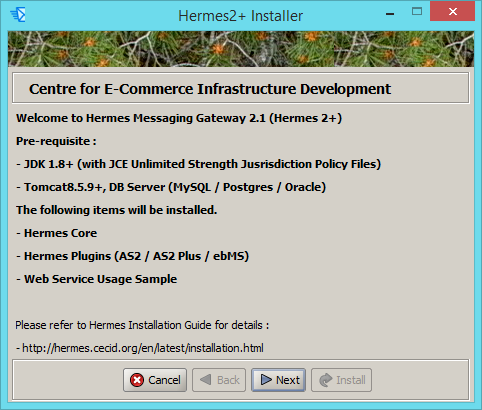
Click Next until you get to Screen in 3.2 Configure Hermes.
3.2 Configure Hermes
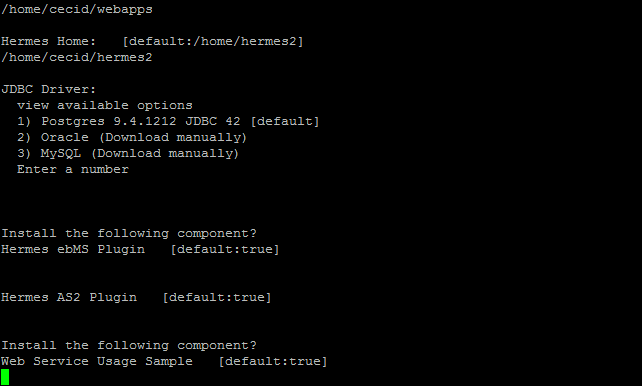
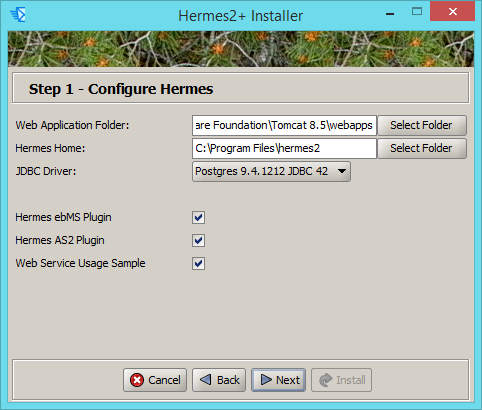
Description of the settings:
Web Application Folder Folder to place the web application (e.g webapps) in Tomcat.Hermes Home Folder to place the Hermes core library and system files. JDBC Driver Specify which database vendor to connect to. One of the following 3 database vendors can be selected:
- Postgres
- Oracle
- MySQL
Hermes ebMS Plugin Optional. Install the ebMS component. Hermes AS2 Plugin Optional. Install the AS2 component. Web Service Usage Sample Optional. Install the sample program of web service client. Click Next and press Yes if the installer prompts you to create a new folder.
3.3 Configure Database Driver
Oracle and MySQL JDBC drivers are not bundled with this Installer. Please download it manually. Once this is done, specify the location of the driver:
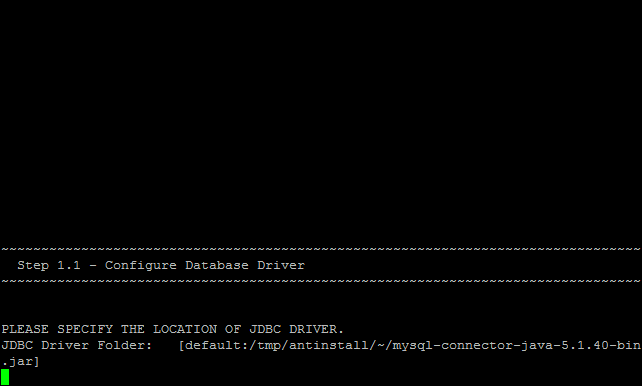
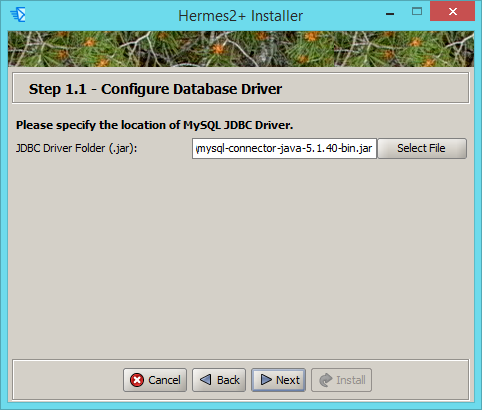
Description of the settings:
JDBC Driver Folder (.jar) Path to the downloaded JDBC driver file.
3.4 Configure Database for ebMS Plugin (Optional)
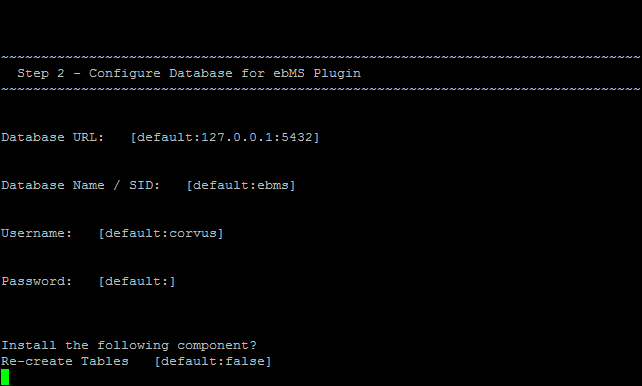
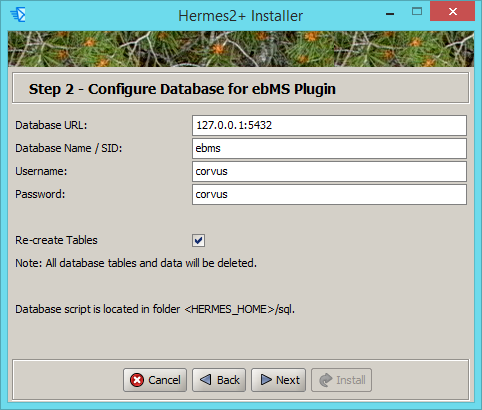
Description of the settings:
Database URL The URL address of the database server. Port number may be attached to the address with the format <HOST_ADDRESS>:<PORT>where<HOST_ADDRESS>is the hostname of the database server and<PORT>is the port number listened by the database server.Database Name/SID For Postgres and MySQL, please specify the name of the database. For Oracle, please specify the Oracle System ID (SID). Username Username to access the database. Password Password to access the database. Re-create Tables Optional. Re-create all the tables in the specified database.
Important Notes:
- If this is your first time installing Hermes, please check this option.
- If you choose to re-create the tables, all of the existing data in the specified database will be removed during installation. Please backup all the data in the selected database before re-creating the tables.
If you followed the steps in prerequisite Step 2 – Database Configuration above, you can just leave the settings as default value. Click Next when you have finished the configuration.
3.5 Configure Database for AS2 Plugin (Optional)
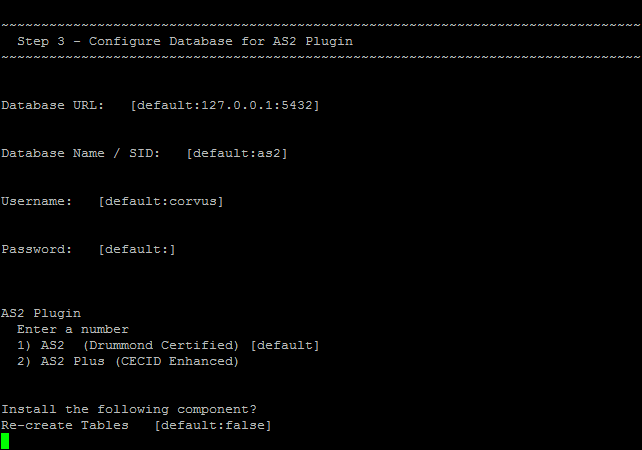
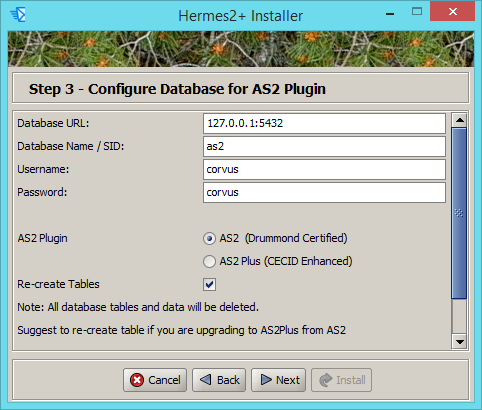
Description of the settings:
Database URL The URL address of the database server. Port number may be attached to the address with the format <HOST_ADDRESS>:<PORT>where<HOST_ADDRESS>is the address of the database server and<PORT>is the port number of the database server address.Database Name/SID For Postgres and MySQL, please specify the name of the database. For Oracle, please specify the Oracle System ID (SID). Username Username to access the database. Password Password to access the database. AS2 Plugin AS2: Original AS2 plugin certified by Drummond Group Inc.
AS2 Plus: Built based on AS2 plugin with new/enhanced features.
Re-create Tables Optional. Re-create all the tables in the specified database.
Important Notes:
- If this is your first time installing Hermes, please check this option.
- If you are switching from AS2 to AS2 Plus or vice versa, we highly recommend you check this option.
- If you choose to re-create the tables, all of the existing data in the specified database will be removed during installation. Please backup all the data in the selected database before choosing to re-create the tables.
If you followed the prerequisite Step 2 – Database Configuration above, you can just leave the settings as default value. Click Next when you have finished the configuration.
3.6 Click on Install and you’re done!
Step 4 – Start Hermes2
Checklist:
- Java JDK 8 or above with Java Cryptography Extension (JCE) Unlimited Strength Jurisdiction Policy Files 7.
- Apache Tomcat 8.5 or above Servlet/JSP Container.
- Database server is running with ebMS and/or AS2 database instances and the tables are created.
- If you are running Unix/Linux, make sure that at least read permissions are set to the core directory and read/write for the AS2 repository directory in
<HERMES2_HOME>. - Start Tomcat.
To verify that Hermes is running, access the following URL from a web browser:
The welcome page should be displayed as below:
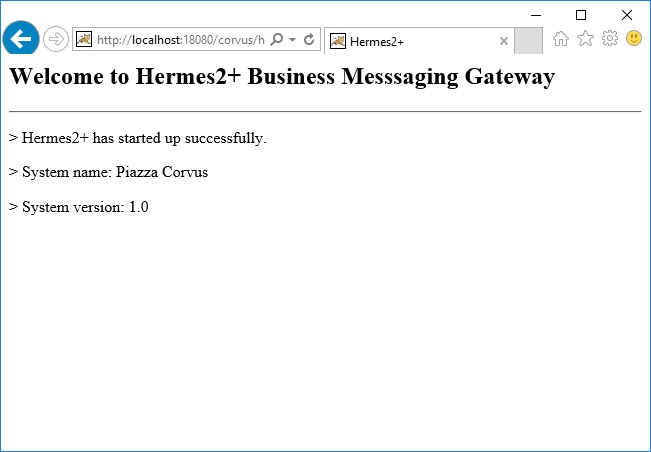
To access the admin page, go to the following URL. The login user and password are the same as the Tomcat user with admin privileges specified in Point 3 of Prerequisite.
Once you have logged in, you should see the Hermes Administration Console page:
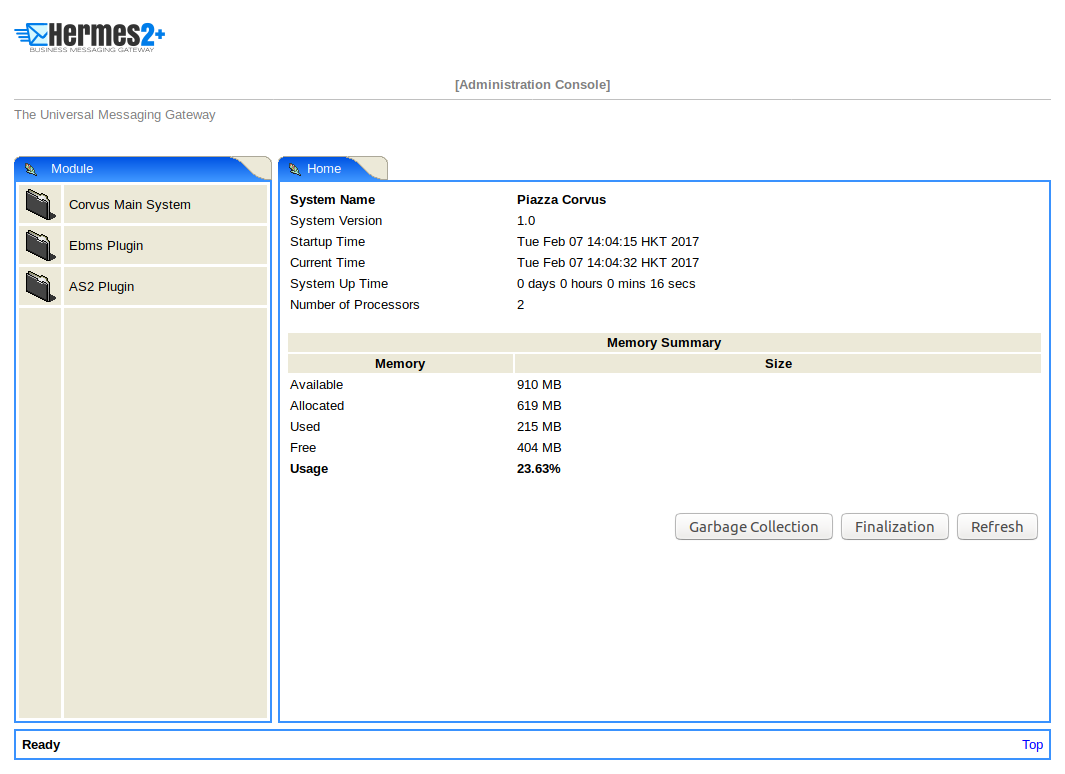
That’s it! Hermes should now be up and running. You can test your setup by running our Web Service Usage Sample in next section.
Partnership Maintenance and Web Service Usage Sample
A tool kit called Web Service Usage Sample was installed under the <HERMES2_HOME>/sample folder. It contains tools to test the Hermes.
Directory Organization
| Directory/File | Description |
|---|---|
config/* |
Contains the configuration file for the sample programs. Each folders contain related files for specific sample programs. |
config/ebms-partnership.xml
config/as2-partnership.xml |
Contains partnership settings for ebMS and AS2 as the input of sample programs. |
logs/* |
A set of logs that contain the output from each sample program. |
lib/* |
The library files used by the sample programs. |
*.bat/*.sh |
The scripts to run the sample programs. |
Preparation
Windows environment
Set environment variable
JAVA_HOMEto the folder where Java is located.Note
To run the sample program, Administrator privilege or root access is required.
UNIX environment
Set environment variable
JAVA_HOMEto the folder where Java is located.Change the owner and the group of
<HERMES2_HOME>and<TOMCAT_HOME>/webapps/corvuswith the following commands:sudo chown -R <tomcat user>:<OWNER_GROUP> <HERMES2_HOME> sudo chown -R <tomcat user>:<OWNER_GROUP> <TOMCAT_HOME>/webapps/corvus
Change the permissions of all files in
<HERMES2_HOME>and<TOMCAT_HOME>/webapps/corvusto775with the following command:sudo chmod -R 775 <HERMES2_HOME> sudo chmod -R 775 <TOMCAT_HOME>/webapps/corvus
Partnership Maintenance
Users need to define a partnership, which contains the messaging details between sender and recipient. It is required to identify the sender and the recipient when transporting messages.
A web service sample program is provided to manage partnerships (add, update and delete). The partnership configuration for the AS2/ebMS loopback test is placed in <HERMES2_HOME>/sample/config/<as2/ebms>-partnership.xml.
| Program | Purpose |
|---|---|
| as2-partnership / ebms-partnership | Maintains a specified AS2/ebMS partnership between sender and recipient. |
Creating an AS2 Partnership
To perform the AS2 messaging loopback test using Steps to run AS2 Sample, you need to create the required partnership by executing the script as2-partnership.
Or:
Access http://localhost:8080/corvus/admin/as2/partnership to configure the partnership manually. Below is a simple loopback configuration sample:
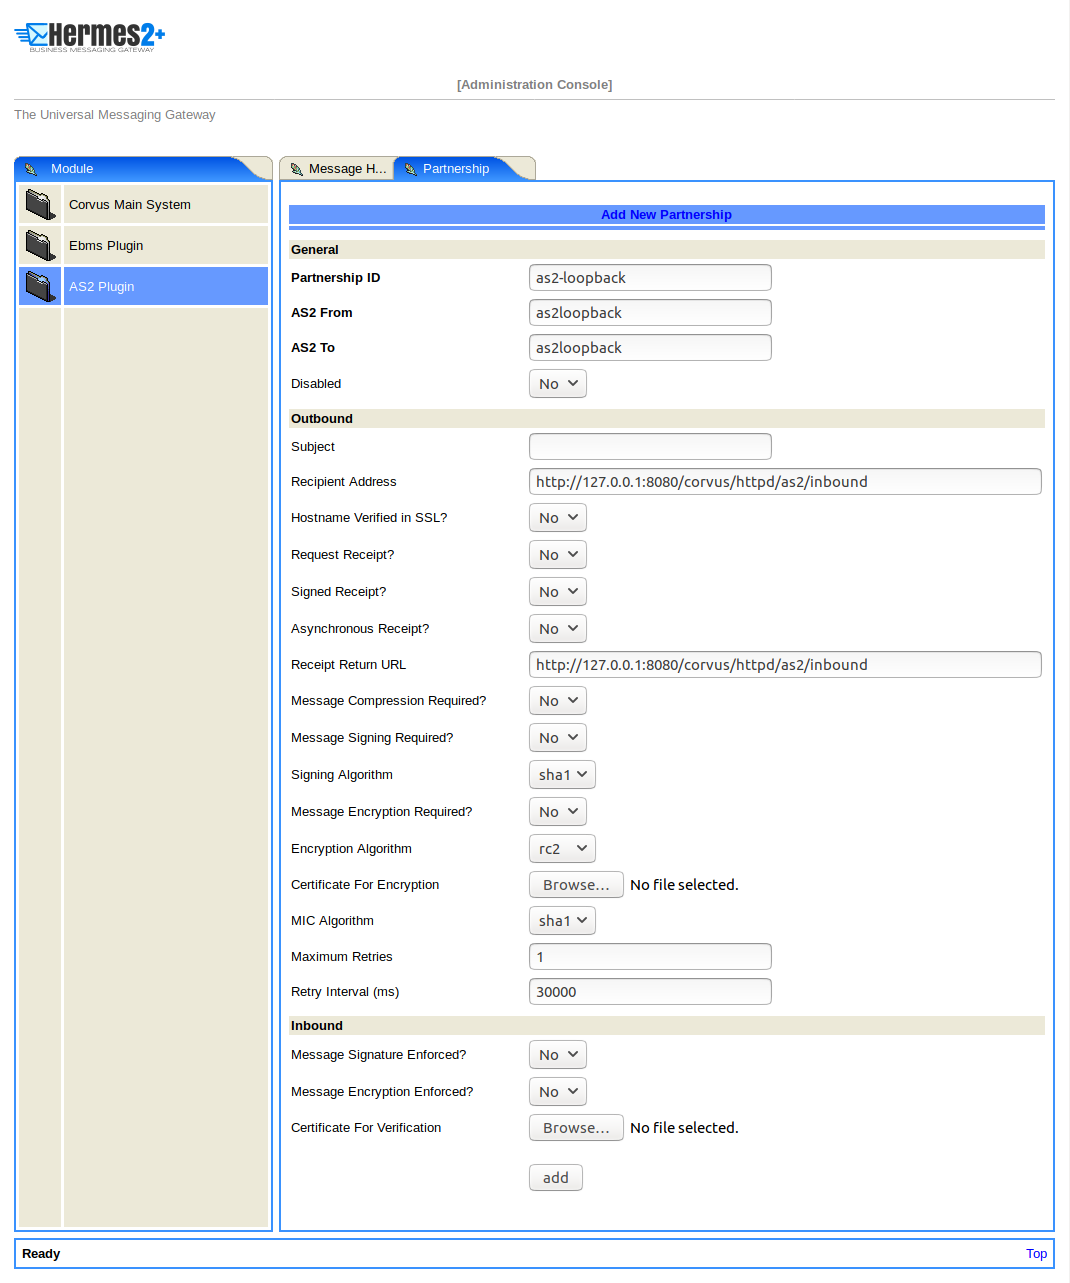
| Partnership ID | as2-loopback |
| AS2 From | as2loopback |
| AS2 To | as2loopback |
| Disabled | No |
| Subject | none |
| Recipient Address | http://127.0.0.1:8080/corvus/httpd/as2/inbound |
| Hostname Verified in SSL? | No |
| Request Receipt? | No |
| Signed Receipt? | No |
| Asynchronous Receipt? | No |
| Receipt Return URL | http://127.0.0.1:8080/corvus/httpd/as2/inbound |
| Message Compression Required? | No |
| Message Signing Required? | No |
| Signing Algorithm | sha1 |
| Message Encryption Required? | No |
| Encryption Algorithm | rc2 |
| Certificate For Encryption | none |
| MIC Algorithm | sha1 |
| Maximum Retries | 1 |
| Retry Interval (ms) | 30000 |
| Message Signature Enforced? | No |
| Message Encryption Enforced? | No |
| Certificate For Verification | none |
Creating an AS2 Plus Partnership
Please follow the same procedure listed in Creating an AS2 Partnership .
Creating an ebMS Partnership
To perform the ebMS messaging loopback test using Steps to run ebMS Sample, you need to create the required partnership by executing the script ebms-partnership.
Or:
Access http://localhost:8080/corvus/admin/ebms/partnership to configure the partnership manually. Below is a simple loop-back configuration sample:
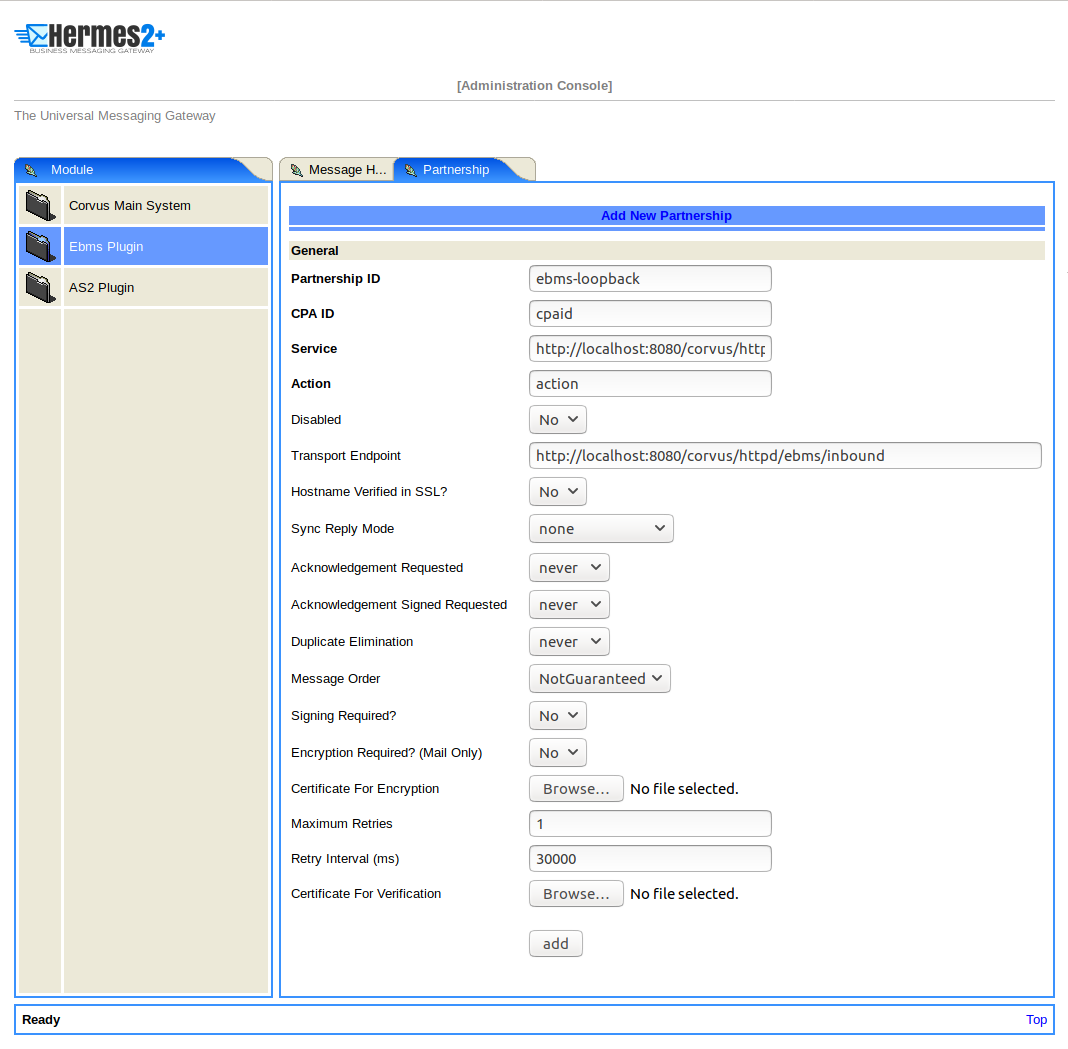
| Partnership ID | ebms-loopback |
| CPA ID | cpaid |
| Service | http://localhost:8080/corvus/httpd/ebms/inbound |
| Action | action |
| Disabled | No |
| Transport Endpoint | http://localhost:8080/corvus/httpd/ebms/inbound |
| Hostname Verified in SSL? | No |
| Sync Reply Mode | none |
| Acknowledgement Requested | never |
| Acknowledgement Signed Requested | never |
| Duplicate Elimination | never |
| Message Order | NotGuaranteed |
| Signing Required? | No |
| Encryption Required? (Mail Only) | No |
| Certificate For Encryption | none |
| Maximum Retries | 1 |
| Retry Interval (ms) | 30000 |
| Certificate For Verification | none |
Web Service Usage Sample Flow
In order to validate the installation of Hermes, the following web service usage sample programs are provided.
| Program | Purpose |
|---|---|
| as2-send / ebms-send | Send an AS2/ebMS message to the installed Hermes. |
| as2-history / ebms-history | Show the message history of Hermes. This program will list the inbox and outbox messages in the data storage of Hermes. The user can view the details of the inbox and outbox. For inbox messages, the user can also download the payload in the repository of Hermes, if available. |
We suggest running the sample programs in the following steps:
- Send a message to the local Hermes by running ebms-send/as2-send.
- Check the status of the sent message by running ebms-history/as2-history and select the message from the outbox.
- Check the received message by running ebms-history/as2-history and select the message from the inbox to download the payload.
Steps to run AS2 Sample
Before executing the following AS2 web service usage sample, the partnership from Creating an AS2 Partnership must be created.
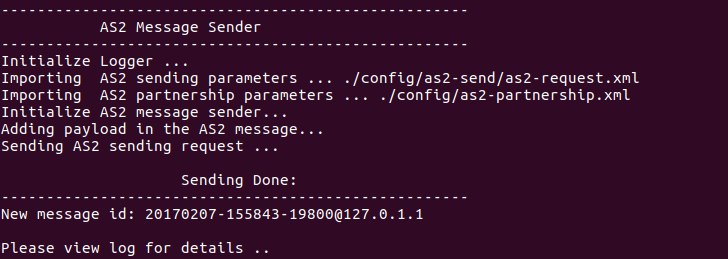
Send a message to the local Hermes using the script as2-send.
This program creates and sends a request attached with the payload named
testpayloadunder the directory<HERMES2_HOME>/sample/config/as2-sendto Hermes.Upon successful execution, you should be able to see the similar output shown as follow:
Check the sent message using the script as2-history.
This program retrieves the list of sent/received message from Hermes.
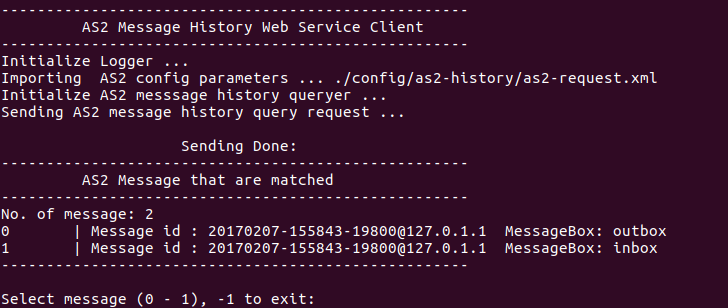
Enter
0to check the sent message. A display similar to the following will appear: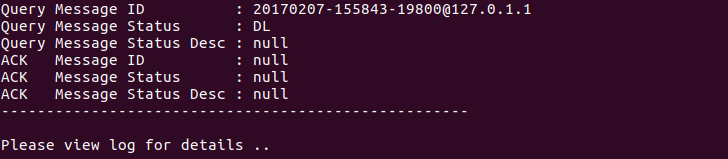
Check the received message and download the payload.
From the select message screen of as2-history, enter 1 to select the inbox message and it will display
Please provide the folder to store the payload(s):. Press enter to save the payload in the current folder. A file namedas2.<timestamp>@127.0.1.1.Payload.0will be downloaded, where<timestamp>is the time as2-send was executed. Open that file and you will see the follow content:
Steps to run ebMS Sample
Before executing the following ebMS web service usage sample, the partnership from Creating an ebMS Partnership must be created.
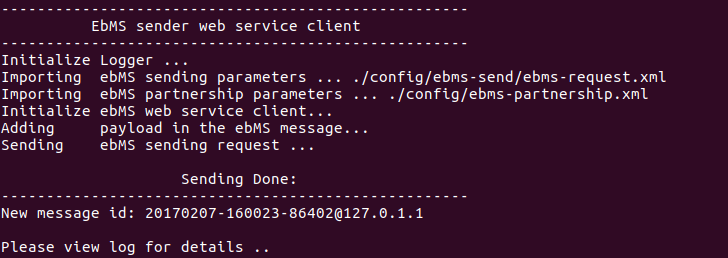
Send a message to the local Hermes server using the script ebms-send.
This program creates and sends a request attached with the payload named
testpayloadunder the directory<HERMES2_HOME>/sample/config/ebms-sendto Hermes.Upon successful execution, an output similar to the following will be displayed:
Check the sent message using the script ebms-history.
This program retrieves the list of sent/received message from Hermes.
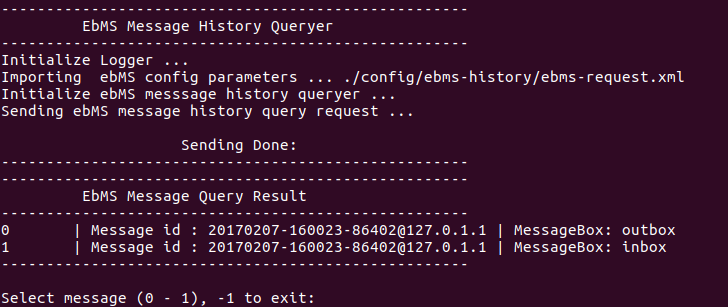
Enter
0to check the sent message and a screen similar to the following will be displayed: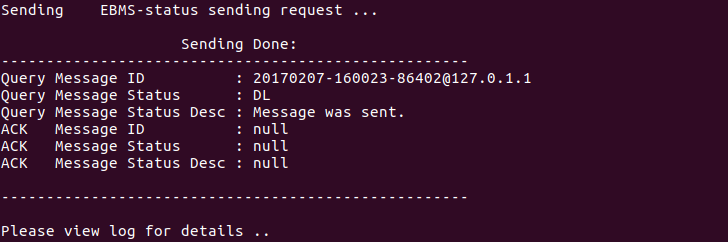
Check the received message and download the payload.
From the select message screen of ebms-history, enter
1to select the inbox message and it will displayPlease provide the folder to store the payload(s):. Press enter to save the payload in the current folder. A file namedebms.<timestamp>@127.0.1.1.Payload.0will be downloaded, where<timestamp>is the time ebms-send was executed. Open that file and you will see the following content:
Configuration for Sending Secure Message
To send signed message through HTTPS, we have to configure a trust-store, keystore and certificate separately in Hermes and Tomcat. For details, please refer to the section Send Messages Through HTTPS.
FAQ
Hermes Deployment
Q1. The corvus.log shows:
hk.hku.cecid.piazza.commons.spa.PluginException: Error in processing activation by handler:
hk.hku.cecid.ebms.spa.EbmsProcessor which is caused by java.io.IOException: exception decrypting data - java.lang.SecurityException: Unsupported keysize or algorithm parameters
A1. Please ensure the Java 8 SE files have been replaced by the JCE files as mentioned in Prerequisite.
Q2. Some log files show the following error:
hk.hku.cecid.piazza.commons.dao.DAOException: Unable to begin transaction.
A2. Ensure PostgreSQL/MySQL/Oracle was installed properly and check the following files:
For AS2:
<HERMES2_HOME>/plugins/corvus-as2/conf/hk/hku/cecid/edi/as2/conf/as2.module.core.xml. There is a tag in this file namedparameterwith the attributename=url. Check thevalueattribute to see if it references the correct server address. The format of thevalueattribute is the same as the JDBC connection string.For ebMS:
<HERMES2_HOME>/plugins/corvus-ebms/conf/hk/hku/cecid/ebms/spa/conf/ebms.module.xml. There is a tag in this file namedparameterwith the attributename=url. Check thevalueattribute to see if it references the correct server address. The format of thevalueattribute is the same as the JDBC connection string.
Web Service Usage Sample
Q1. The following exception is thrown:
Exception in thread "main" java.lang.UnsupportedClassVersionError: xxx (Unsupported major.minor version 49.0)
A1. It is very likely you are using an incompatible Java version. The web service usage sample requires Java 8 SE or above to run properly. In the terminal, please type java –version to check the Java version.
Q2. The following error occurs:
Sending ebMS/AS2 sending request ...
java.net.ConnectException: Connection refused: connect
A2. Check that the Application Container (Tomcat) has been started.